How to Zero Your Red Dot Sight: A Step-by-Step Guide
Introduction
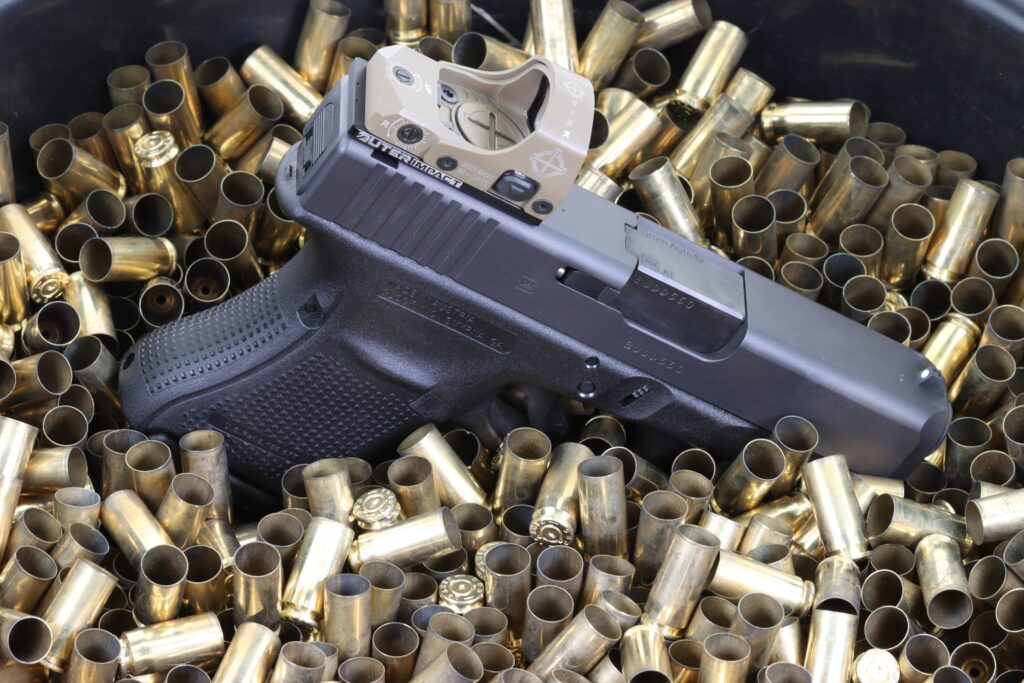
Zeroing your red dot sight is a fundamental skill for any shooter. A well-zeroed sight ensures that your shots hit the target where you aim, providing accuracy and confidence in your shooting. In this guide, we will take you through the step-by-step process of zeroing your red dot sight, from initial setup to fine-tuning. Whether you’re a competitive shooter, a hunter, or a self-defense enthusiast, mastering this skill is essential for success. All OuterImpact mounts are precision machined from aircraft grade aluminum and backed by a Lifetime Warranty.
1. Understanding Zeroing Your Red Dot Sight
1.1 Importance of Zeroing
Zeroing ensures that your point of aim aligns with the point of impact, making your shots accurate and predictable. It’s essential for hitting your target consistently.
1.2 Components of Zeroing
Zeroing your red dot sight involves adjusting windage (horizontal) and elevation (vertical) to match the point of impact with your point of aim.
2. Gathering the Necessary Tools
2.1 The Right Firearm and Ammunition
Use the firearm you plan to shoot with and the ammunition you’ll use regularly. Consistency is crucial.
2.2 A Stable Shooting Platform
A stable shooting platform, such as a benchrest or sandbags, provides a consistent and secure base for zeroing.
2.3 Eye and Ear Protection
Always prioritize safety. Eye and ear protection are essential when shooting.
3. Initial Setup and Bore Sighting
3.1 Mounting the Red Dot Sight
Mount your red dot sight securely to your firearm following the manufacturer’s instructions.
3.2 Bore Sighting
Bore sighting aligns your sight with the barrel’s bore. It doesn’t zero your sight but gets you on paper at close range, saving time and ammunition during the zeroing process.
4. The Step-by-Step Zeroing Process
4.1 Start at a Close Range
Begin zeroing at a close range, typically 25 yards/meters, to get on paper.
4.2 Fire a Group of Shots
Fire a group of shots from a stable position, aiming at the center of your target.
4.3 Adjust Windage and Elevation
Using the adjustment knobs on your red dot sight, move the point of impact to match your point of aim. Adjust windage (left/right) and elevation (up/down) as needed.
4.4 Fine-Tuning and Confirmation
Repeat the process, firing a few shots, and making slight adjustments until your shots consistently hit the desired point of impact.
5. Tips and Tricks for Precision
5.1 Consistency Is Key
Maintain consistent shooting techniques and body position during the zeroing process.
5.2 Record Your Adjustments
Note the adjustments you make, including the number of clicks or degrees, for future reference.
5.3 Patience Pays Off
Zeroing takes time and patience. Don’t rush the process, as precision is the goal.
6. Maintenance and Regular Checks
After zeroing, periodically check your red dot sight to ensure it remains zeroed, especially after any significant impact or when removing and remounting the sight.
7. Conclusion
Zeroing your red dot sight is a critical skill for any shooter. With the right tools, proper techniques, and patience, you can achieve consistent and accurate shots. Regular maintenance and checks will ensure your sight remains zeroed, allowing you to enjoy the benefits of precise aiming and increased shooting confidence. Mastering this skill will elevate your shooting performance, whether you’re on the range or in the field. See our other articles on red dot mounts here.